On the Mark: Inspecting Marked Text and Characters for Color and Quality
For many electronics products sold today, markings such as text, characters, and symbols are applied to component surfaces via laser or other methods. Some markings are necessary to provide user instructions or information for device control and operations. Some are used by the manufacturer for quality and tracking purposes such as serial numbers or lot numbers, and other marks may be for branding such as logos.
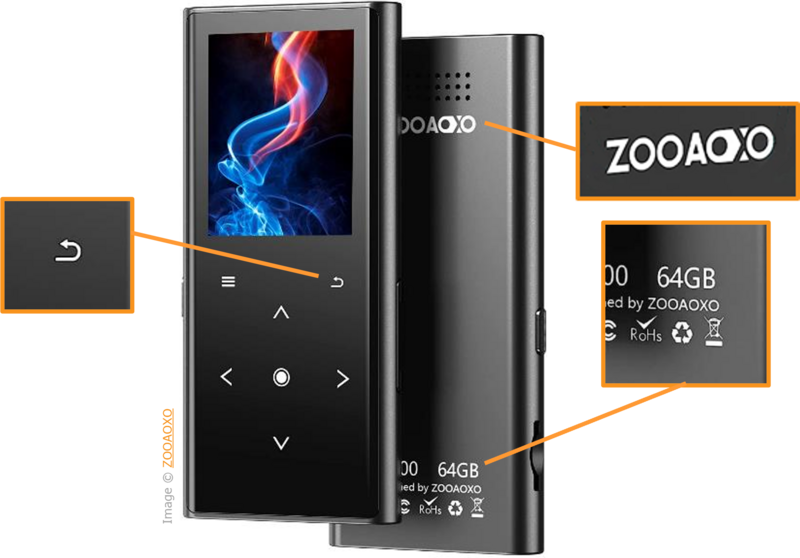
Examples of a few types of markings on a consumer electronics product.
Many types of products are also governed by various regulations that require specific information to be displayed on the product, for example the CE mark in the EU or a RoHS hazardous materials safety mark.
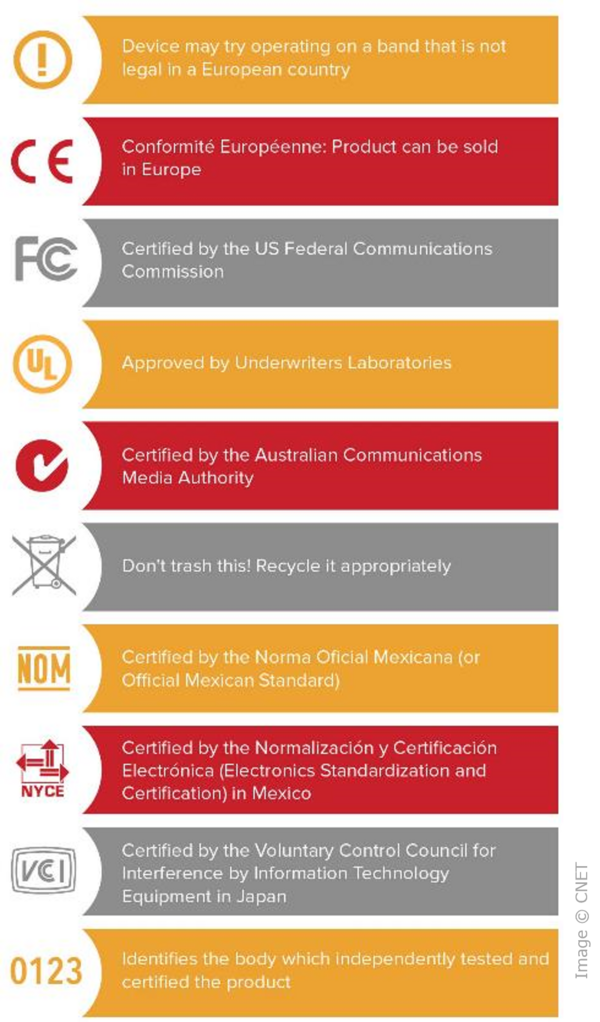
Examples of the varous product regulations and markings around the globe.
Typically, these standards not only require specific markings to be displayed on products, but also that the markings remain for the lifetime of the product, meaning they cannot be easily removed or smudged, they must be resistant to solvents, and similar criteria. This requirement leads many manufacturers to opt for permanent marking methods such as laser etching.
Once applied, manufacturers have to inspect markings to ensure both accuracy and quality:
- Are they the correct letters, numbers, and symbols?
- Are they in the correct location and orientation (e.g., not rotated or upside down)?
- Are the characters properly formed and legible?
- Do they meet brand color specifications?
- And above all, do they conform to the specifications of any regulatory requirements?
Marking Quality Considerations
To verify and inspect markings for all of these crietera is a challenge, in part due to the range of different validations and measurements that are required. Reading serial numbers and checking the correctness of text is typically considered an OCR (optical characte recognition) function. Checking the visual appearance and quality of markings is a different and complex set of functions: Inspecting the shape and formation to ensure markings are complete (e.g. no inclusions or exclusions) can be a machine vision task, while checking color and contrast might be done with a spectrometer. In some settings, human inspectors are still used.
Futher complicating the inspection process is that markings may be applied to different types of surfaces such as metal, plastic, glass, or ceramic, and in different colors and contrast levels. Application methods include lasers (CO2, fiber, UV), chemical etch, print (e.g., ink jet), paint jet, UV LED, and mechanical (e.g., dot peen, scribing, stamping). Markings may also be very small, for example the single stroke width of a letter can be just tens of microns.
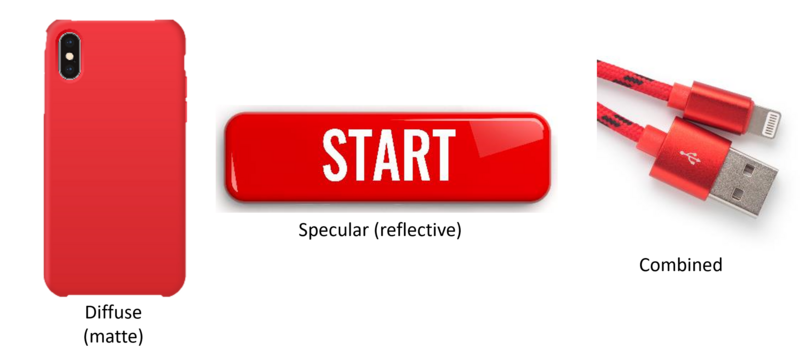
Markings applied to different surface finishes.
With this diverse set of requirements, manufacturers need a solution that can verify multiple parameters at once. Radiant's new Area Color Inspection System (ACIS™) uses the capabilities of our ProMetric® Imaging Colorimeters in an innovative configuration to perform high-resolution, precise color and quality measurement. ACIS can simultaneously:
- Verifiy text/numbers are correct
- Measure character dimensions at user-defined sampling points (height, width, stroke width, distance between features)
- Evaluate character/symbol shape compared to “golden sample”
- Enable measurement of multiple points simultaneously to assess uniformity
- Interface with production management systems
- Provide dynamic registration (alignment/position tolerance)
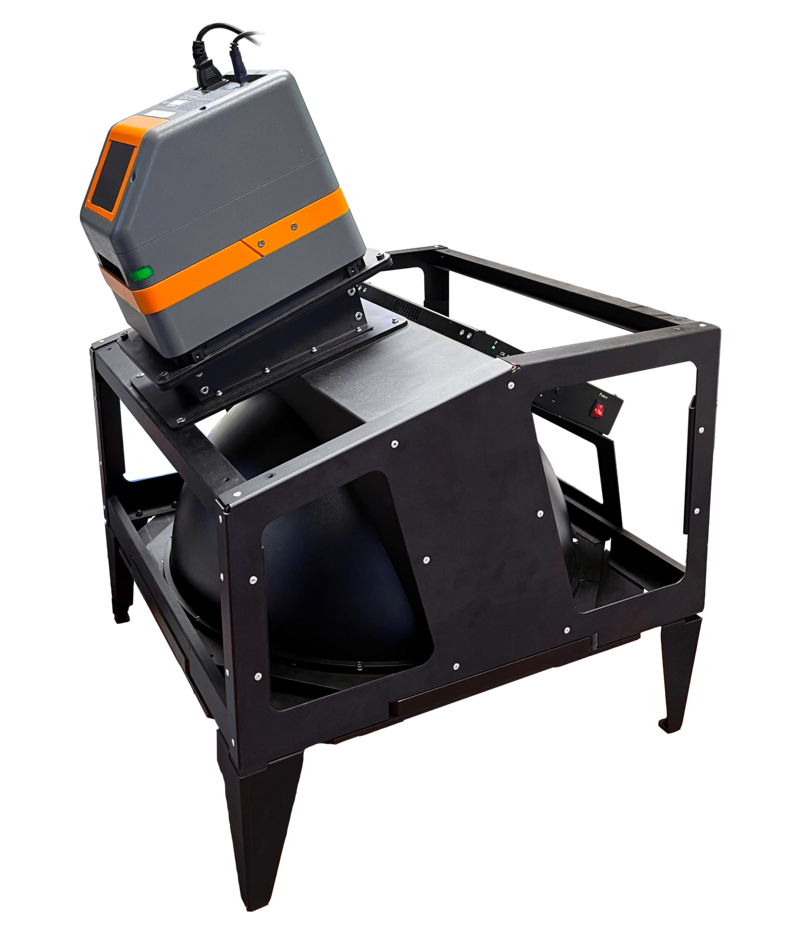
ACIS™: Area Color Inspection System.
To learn more about markings inspection and how ACIS provides efficient, automated measurement of precise color, dimensions and positioning, formation, and other attributes, listen to this webinar from the Vision Spectra Conference 2023. Presented by Ashely Faloon, Ph.D., Senior Software Development Engineer Radiant, the webinar covers topics including:
- The challenges of detecting defects and ensuring the quality and legibility of markings on product surfaces such as metal, plastic, glass and ceramic.
- The full range of criteria that manufacturers need to assess, including: text/symbol shape (inclusions and exclusions), dimensions, placement/orientation, color, and contrast.
- Various methods used for quality inspection of markings on product surfaces, such as machine vision cameras and spectrometers, and their advantages and drawbacks.
- How the science of imaging colorimetry can be applied to perform defect detection and color inspection of markings with greater precision and efficiency.

Join Mailing List
Stay up to date on our latest products, blog content, and events.
Join our Mailing List