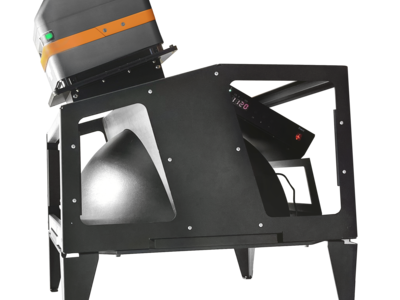
INSPECT.assembly™ Automated Visual Inspection Station
Turnkey Solution for In-Line Inspection of Complex Electromechanical Assemblies.
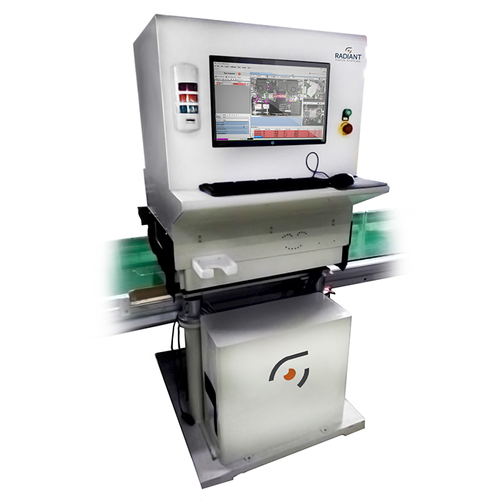
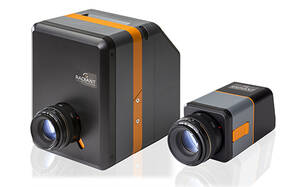
The INSPECT.assembly solution is a fully-integrated inspection station that utilizes a Radiant Vision Systems ProMetric® Y-series imaging system, bright field lighting, and programmable inspection software to detect subtle, low-contrast defects on complex assemblies.
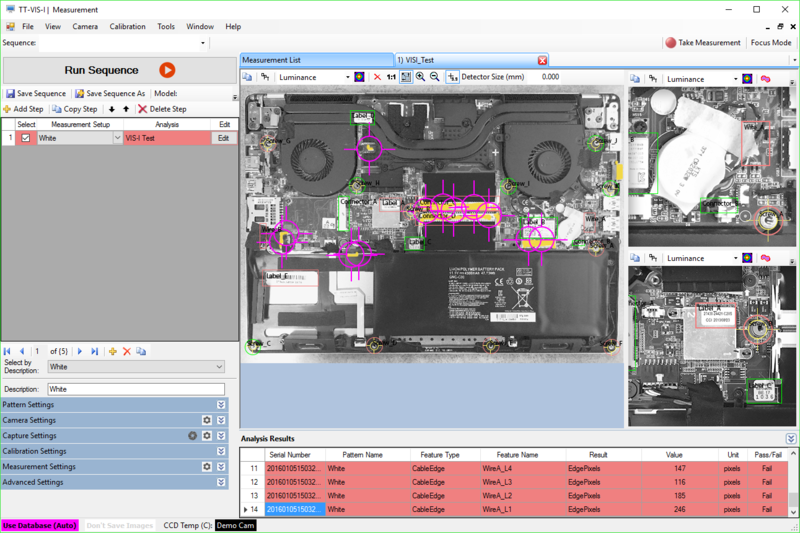
The system can be easily added to the production line to accommodate real-time inspection with greater accuracy and repeatability than human inspectors or traditional machine vision systems, while occupying the same footprint as an inspector on the line. The system can track inspected parts by serial number while recording defects, defect type, and defect trending data. The system performs a range of machine vision inspections, simultaneously or in sequence, employing the breadth of inspection tools packaged in Radiant’s new, configurable INSPECT Software.
The INSPECT.assembly solution can be employed in applications requiring inspection of highly-complex electromechanical assemblies for sub- and final assembly verification for detection of subtle flaws in high-value components.
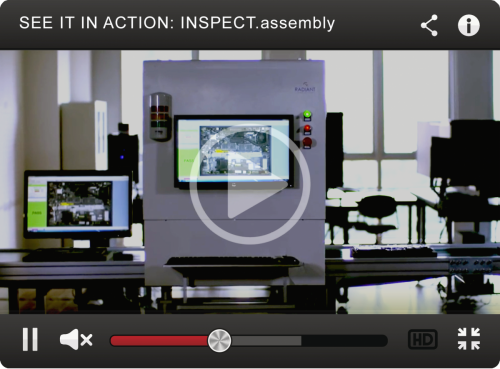
Watch the INSPECT.assembly system performing automated visual inspection of assemblies.
Watch the video ►
Replicate Human Inspection and Judgment

In manufacturing environments where human inspectors are necessary for their superior perception of defects beyond the capabilities of traditional machine vision, but where automation is desired for its efficiency, the INSPECT.assembly system provides the ideal solution. Human perception enables subtle defect detection and judgment of acceptable tolerances for the type, total, or scope of defects.
However, after hours inspecting complex parts and minute variations, human inspectors fatigue physically and mentally, causing the accuracy of their inspections to degrade. Using a second inspector in serial to perform repeat inspection is a potential, but costly, solution. This is compounded by the average two- to four-month turnover rate for human inspectors, resulting in significant time and cost to hire and train personnel to support inspection operations.
Alternatively, the INSPECT.assembly automated visual inspection solution is able to provide absolute accuracy in a single inspection, with continuous and reliable performance. The INSPECT.assembly leverages high-dynamic-range, scientific-grade image sensors to replicate human visual sensitivity to contrast, enabling it to identify diverse and obscure features simultaneously, without repeat inspection. The system also features advanced logic to apply specific defect tolerances for pass/fail determinations, while offering superior objectivity and repeatability to human inspectors.
Unmatched Camera Resolution and Dynamic Range
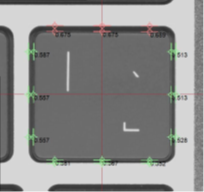
The performance of a machine vision inspection system is dependent on the acquisition of high-quality images, enabling the system to “see” parts and defects in greater detail and apply meaningful evaluations to qualify these details. The resolution of a standard machine vision camera sensor will typically range from one to five megapixels.
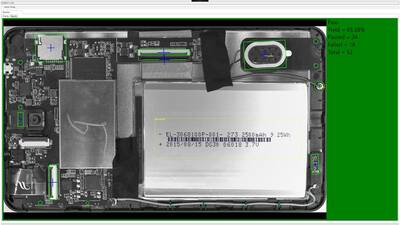
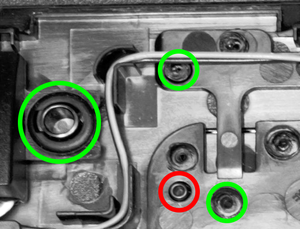
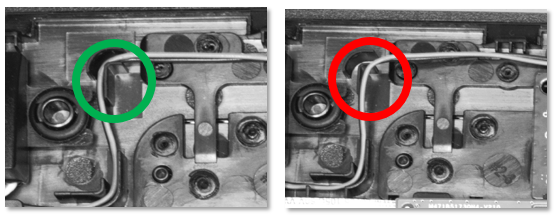
INSPECT.assembly can even detect defects that may go unnoticed by human inspectors, including misaligned cables and connectors, gap variations of less than 1 mm between keys in a keyboard, or the presence or absence of tiny black screws from drill holes in a black component. With tolerances so precise, the INSPECT.assembly provides a production-level inspection solution with the objectivity, endurance, and repeatability of a machine vision system, while achieving visual inspection capability equal to and even surpassing human perception. This combination addresses manufacturing demands for both operational efficiency and absolute product quality in high-value and high-risk products.
Photometry-Based Image Analysis
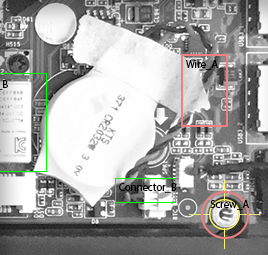
Because the INSPECT.assembly system’s machine vision software is based on Radiant’s leading photometric software for light measurement, the system is able to inspect assemblies in intricate detail using the same techniques employed to evaluate properties of light. Software tools for detecting just-noticeable differences (JND) in visible light uniformity (in illuminated components) can be leveraged to detect anomalous contrast variations (on non-lit components). This capability allows the INSPECT.assembly system to identify unknown defects (unpredictable features and shapes) in unknown locations (unprogrammed points of interest), just like a human inspector.
Install Directly onto Production Lines
The INSPECT.assembly is designed for integration directly into the production line, with an adjustable frame to accommodate conveyer heights from 525 mm to 950 mm. The total operating footprint is within 1860 mm (H) x 800 mm (W) x 700 mm (D), occupying the same physical footprint as a human inspector on the line.
The integrated ProMetric camera and machine vision lighting are housed within the INSPECT.assembly enclosure to prevent interference with other equipment and eliminate the effects of ambient light, allowing the INSPECT.assembly system to capture the most high-contrast images of parts for inspection. Parts on the line remain in motion, and an integrated sensor (or optional barcode reader) within the INSPECT.assembly system provides “part-in-place” triggering to prompt the camera and lighting to capture an image as a part enters the field of view. This method supports a line speed of 122 mm (0.4 feet) per second, with indexing time at a minimum of 7 seconds from part to part.
Designed to Meet Variable Inspection Requirements
Complete Machine Vision Toolset in Field-Proven Test Sequencing Software
Key Features and Highlights
-
Evaluate product quality with greater precision and consistency than multiple human inspectors performing repeat inspections
-
Track defect trends, categorizing defects by type, test, or location on the product to determine scope and severity
-
Equivalent to human perception for low-contrast defect and component differentiation
-
In-line inspection with equivalent physical footprint to a human inspector on the line
-
Operate 24/7 with high repeatability
-
Capture and measure large areas in a single image
-
Program software with sophisticated pass/fail criteria unique to each inspection application
Awards and Recognition
The INSPECT.assembly Automated Visual Inspection Station has been honored with these awards for innovation:
- Vision Systems Design – 2017 Innovators Awards; Silver-level
| Parameter | INSPECT.assembly™ Automated Visual Inspection Station |
|---|---|
| Field of View (Maximum) | 600 mm x 400 mm |
| Line Height (Minimum) | 525 mm |
| Line Height (Maximum) | 950 mm |
| Line Speed | 12 PPM |
| Cycle Time | 5 seconds (Maximum) |
| System Dimensions (W x H x D) | 650 mm x 1200 mm x 950 mm (Maximum) |
| Operating Footprint (W x H x D) | 1650 mm x 1200 mm x 1550 mm (Automatic or Manual Load/Unload Mode) |
| Weight | 90 kg |
| Height | Adjustable; Locking Feet |
| Portability | Rotating Caster Wheels (4) |
| Communication Interface | Gigabit Ethernet |
| Power | 110-220V AC, 10 AMP |
| Operating Temperature | 0 - 30° C |
| Operating Humidity | 20 - 70% non-condensing |
| Camera* | ProMetric® Y Imaging System Available models: Y16, Y29, Y45, and Y61 |
| Lighting* | Bright White LED |
| Software* | Radiant INSPECT™ Software |
| PC* | 19-in. Rackmount PC, Windows® 10 64-bit, Core i7 CPU, 32 GB RAM, 1 TB Hard Drive, Ethernet Ports (2), 700W P/S, 24-in. Touch Screen |
*Included in fully-integrated INSPECT.assembly Automated Visual Inspection Station. Optional integrated barcode reader.
Specifications subject to change without notice.
Typical Applications
-
Sub-assembly verification: Presence, position, and routing of wires/cables, fasteners, connectors, screws, internal components
-
Final assembly verification: Gaps, steps, bonding, aperture alignment, label/logo quality and placement
-
Product tracking, reporting, and manufacturing history for process control
How can we help?
Please complete the following fields and we’ll follow up with you promptly.
